

Introduction
In This article, we will try image segmentation using Mask RCNN. Region-Based Convolutional Neural Networks (R-CNN) is a family of machine learning models for computer vision and specifically object detection. It's the successor of Faster-RCNN. While previous versions of R-CNN focused on object detection, Mask R-CNN adds instance segmentation.
we will use tensorflow-gpu==1.15 for training purposes. Check the Mask_RCNN Github repository. It's implemented in the TensorFlow framework using Resnet101 as the default backbone.
What is Image Segmentation
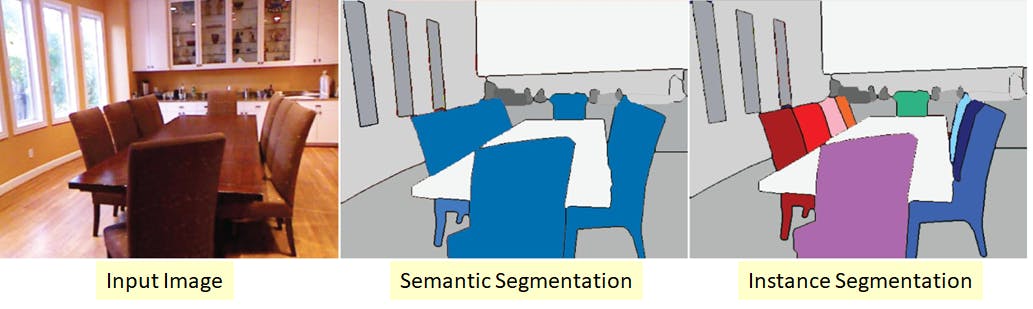
Image segmentation is like an advanced form of classification. In Classification, we used to classify pictures into classes. In the case of image segmentation, we classify each pixel of the image into different classes. The goal of segmentation is to simplify and/or change the representation of an image into something that is more meaningful and easier to analyze.
Self Driving cars has some concept of image segmentation for driving.
Mask_RCNN Module
This is an implementation of Mask R-CNN on Python 3, Keras, and TensorFlow. The model generates bounding boxes and segmentation masks for each instance of an object in the image. It's based on Feature Pyramid Network (FPN) and a ResNet101 backbone.
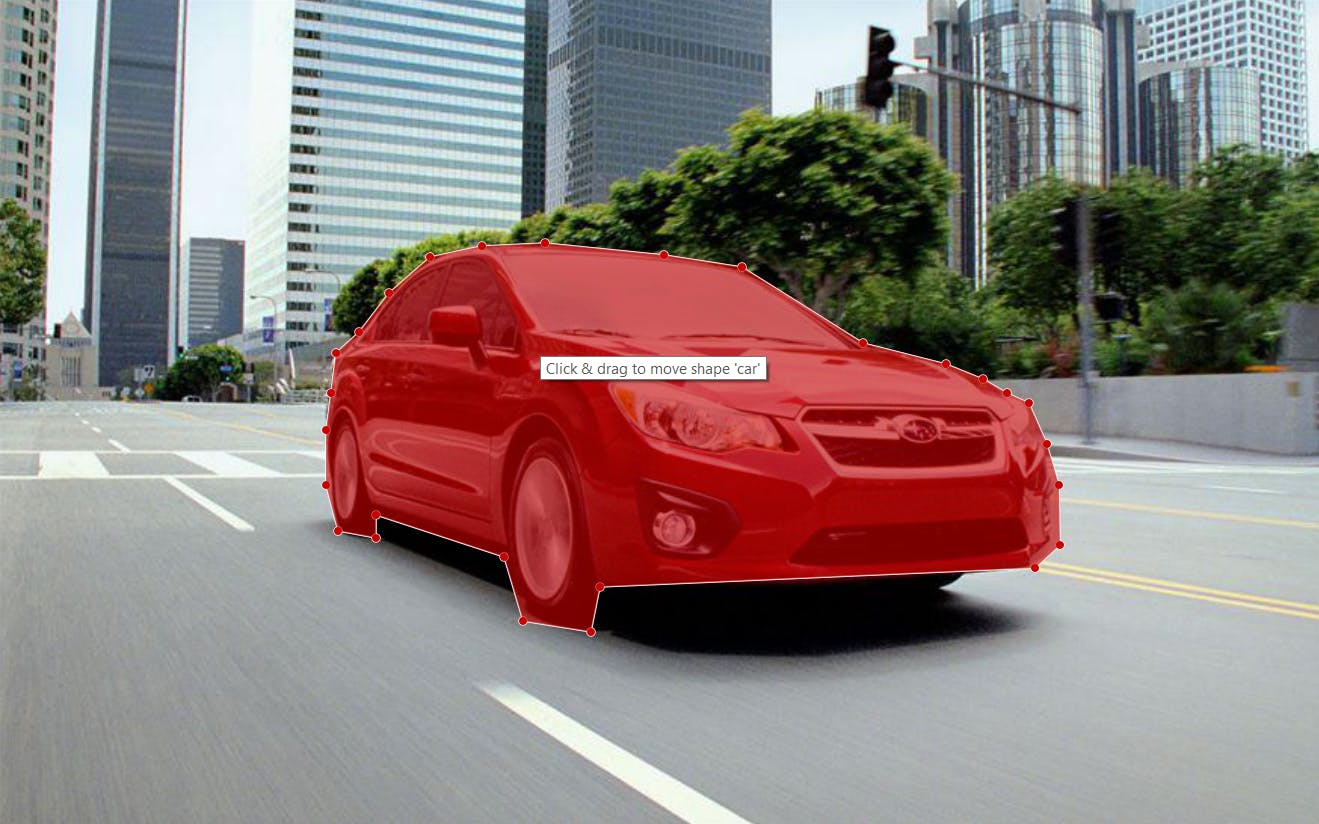
How to Annotate Data
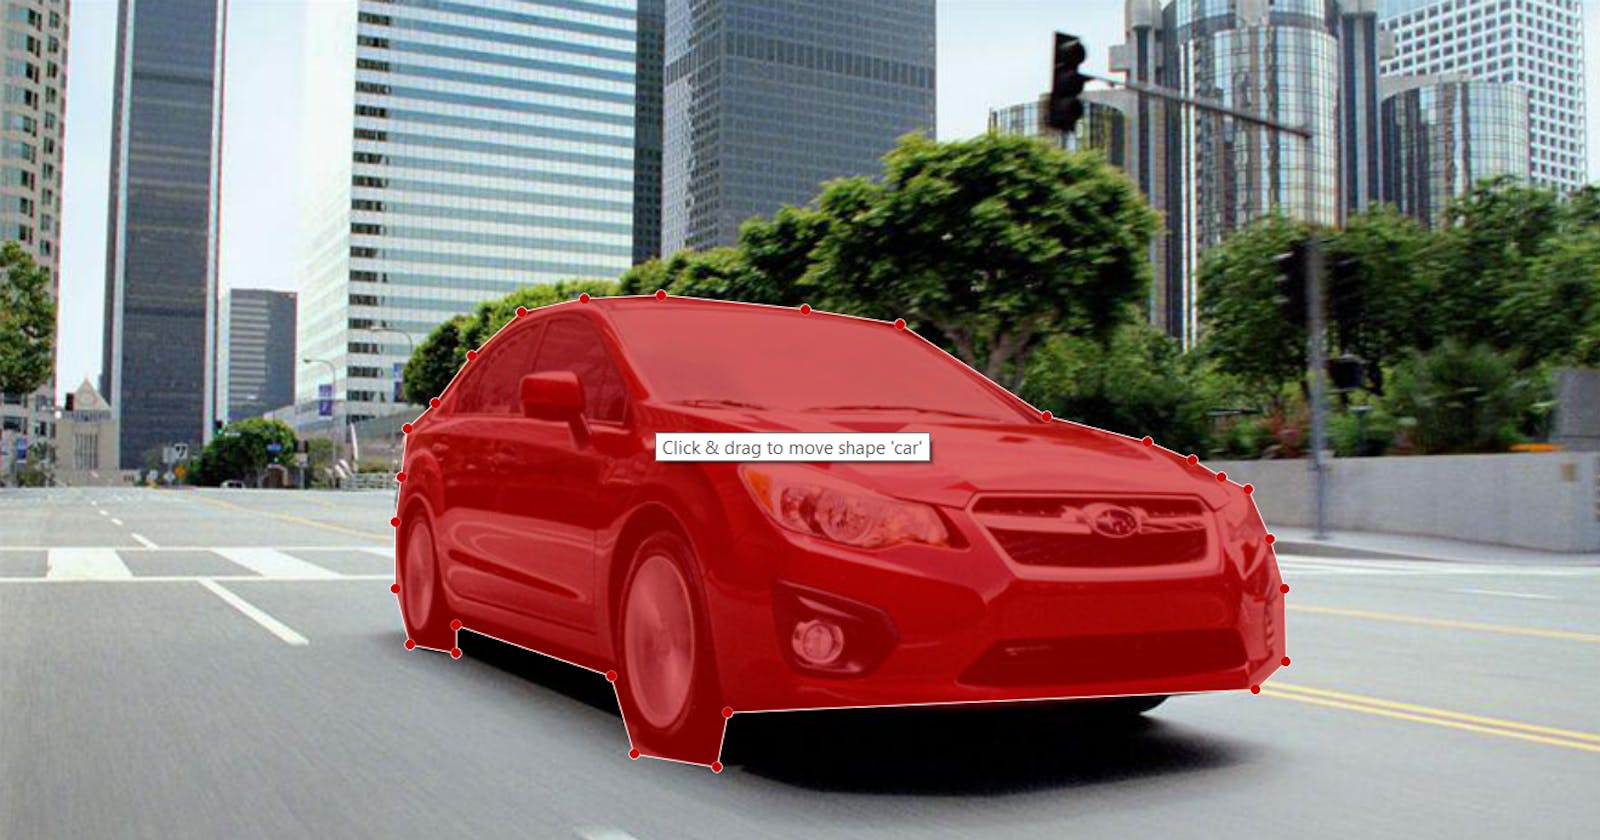
LabelMe is open-source tool for polygen image annotations inspired by MIT Label Me
# Python3 on Ubuntu
sudo apt-get install python3-pyqt5  # PyQt5
sudo pip3 install labelme
Check Labelme Documentation for installtion on winodws & Mac
Training Part
1.Git clone the Mask-RCNN-Implementation
2.Install the Mask_Rcnn module.
python -m pip install git+https://github.com/matterport/Mask_RCNN
3.Create Data_folder in Root Directory and arrange the folder in the below manner. Divide the Data into 70/30 for Train and Val respectively.
- Data_folder
    - train
        - img1.jpg
        - img1.json
        - img2.jpg
        - img2.json
        ...
    - val
        - img3.jpg
        - img2.json
        - img4.jpg
        - img4.json
        ...
4.Change the configuration according to your Data and System specifications.
# Configuration
# Adjust according to your Dataset and GPU

IMAGES_PER_GPU = 2 # 1

# Number of classes (including background)
NUM_CLASSES = 1 + 1 # Background

# typically after labeled, class can be set from Dataset class
# if you want to test your model, better set it correctly based on your training dataset

# Number of training steps per epoch
STEPS_PER_EPOCH = 100
Training the model on Custom Data
python customTrain.py train --dataset=path_to_Data_folder --weights=coco
ReTraining from the Last Checkpoint
python customTrain.py train --dataset=path_to_Data_folder --weights=last
Evaluation of the Mask_RCNN Model
python customTrain.py evaluate --dataset=path_to_Data_folder --weights=last
Test the model for segmentation
pip install pixellib
import pixellib
from pixellib.instance import custom_segmentation


model_path = "Trained_Model_path"
image_path = "Image_path"
output_path = "output_path"

segment_image = custom_segmentation()
segment_image.inferConfig(num_classes= 4, class_names= ["BG", "Arduino Nano", "ESP8266", "Raspberry Pi 3", "Heltec ESP32 Lora"])
segment_image.load_model(model_path)
segment_image.segmentImage(image_path, show_bboxes=True, output_image_name=output_path)
from PIL import Image
from matplotlib import pyplot as plt

img = Image.open(output_path)
plt.figure(figsize=(12, 12))
plt.imshow(img)
Colab Notebook for Example training on Microcontroller Segmentatiom
This article was originally published on CodePerfectPlus
More Articles by Author
- Deploy Your First Django App With Heroku
- Single-layer Neural Networks in Machine Learning (Perceptrons)
- 5 Tips for Computer Programming Beginners
- What Is Git and GitHub?
- What is Simple Linear Regression?
- Introduction to Machine Learning and its Type.